Pages

Showing posts with label DIY. Show all posts

Thursday, April 25, 2013

Wall Art Anniversary Gift

If yall are anything like Baby Joe and I this is how our anniversary gift conversation goes:

Joe:  Are we doing gifts for our anniversary?

Beth:  No.  I don't want anything b/c I buy whatever I want.

Joe:  Okay.

That's what we say.   But here's what we do:  Act like we aren't getting each other anything - and usually Joe gets nothing.  But then he ALWAYS gets me something.  I think last year we actually did take a break and not do gifts and it was great; no stress.  But years 1 and 2....talk about me feeling like a jackass.

Year 1:  We went to see Date Night at theater at Northpark in Dallas.  Walked to Macy's b/c Joe wanted a new cologne.  Then we went to Bob's for an amazing dinner.  I visit the restroom after ordering and get back to the table and there is a Tiffany's box waiting for me.  I open it - it's a beautiful sterling silver Paloma Picasso heart necklace.  Joe says "You like it?" and I say "Duh" - or something like that and then he says "Well, let me know if you like this too".  Boom!  Slams ANOTHER Tiffany's box on the table.  Matching bracelet.  Me - cologne.  Him - Tiffanys.

Year 2:  I get him nothing.  We again go to Bob's.  The Mavs lose - he's in a terrible mood.  Get home - Boom!  Humongous package with a brand new Coach purse that hadn't even hit the floor yet.  My normally mute husband somehow talked the girls into giving him something that wasn't suppose to be sold until Tuesday.  What color is the purse?  Tiffany Blue.  Me - nothing.  Him - Coach purse. 

So he is the most thoughtful husband ever and I suck.  I know I'll never beat him in giftgiving so I decide to go the sentimental route.

I lookup the traditional 4th anniversary gift - it's flowers.  Yea - not gonna work.  So next I google "anniversary gifts for men". Not kidding.  I did the link to a link to a link thing and finally ended up on Etsy (go figure) and got some ideas. 

Less than $20 spent and a trip to Hobby Lobby later.  I have a gift!


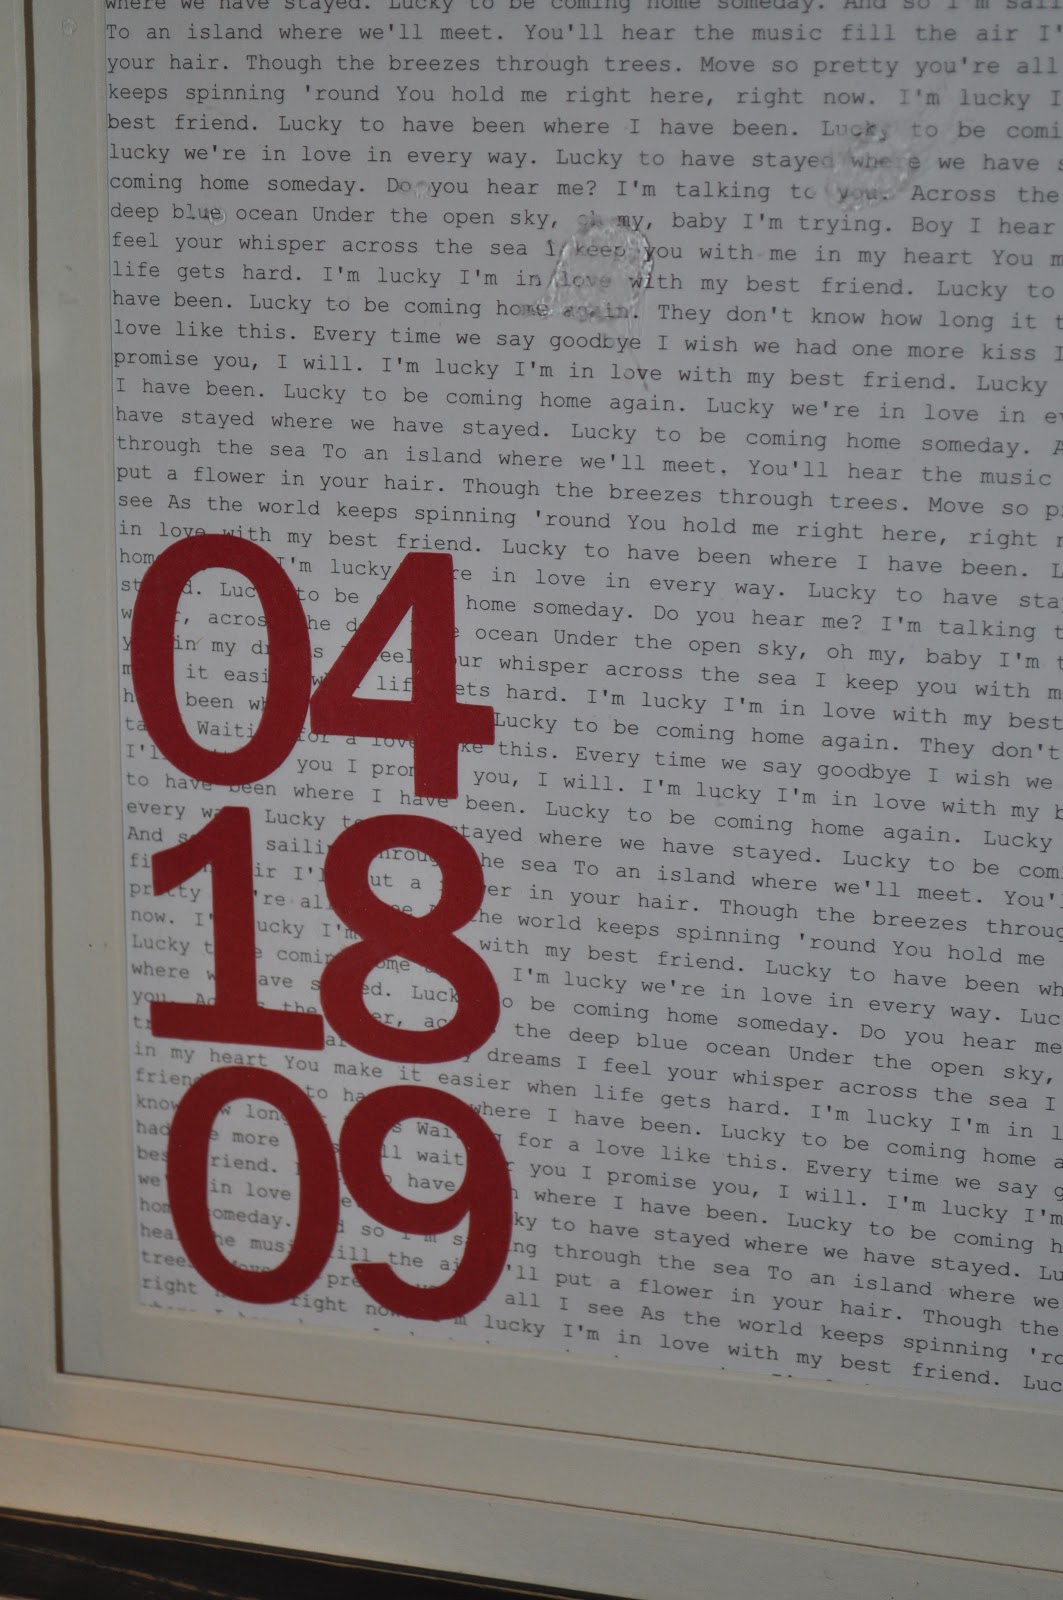
This was super simple folks.  I busted out some resume paper and googled the lyrics to our first dance song, "Lucky" by Jason Mraz and Colbie Caillet, and copy and pasted it into Word.  Then repeated the copy and paste.  Adjusted the margins and was done with that background.  The other frame has our wedding vows repeated for the background. 

Next I got out my handy dandy worth every penny Cameo and cut the letters and numbers out of red paper I had.  Glue sticked it on, put it in the frame, and Voila!  Gift complete.

Now I will mention I did not find a frame I liked in black.  I had it in my head I wanted a frame with at least double matting since the lyrics and vows background was busy.  Here's what the frames originally looked like. 


I had some black latex paint leftover from another project and painted them sloppily and then used a sanding block to shabby chic them. 

Joe's pretty easy to read and he liked them a lot.  We've got them hung up on either side of our bed.  I think the bedroom was a great place for them because it's something so sentimental and personal.  And we had no wall art hung up in there so that marks something else off my to-do list!

I've been gettin' on the wall art - another post about it coming soon! 

I highly recommend following me on Instagram if you like my crafts.  There should be a button on this page somewhere for that exact purpose.  I'm pretty good about posting pics of projects right when I finish on there - plus you get the added bonus of seeing pics of Evelyn!

Friday, April 12, 2013

Updating a Brand New Storage Cabinet

For those of you with kids, you know how their toys get out of control and take over your house.  Downstairs we turned E's old room into her playroom and keep the big toys there and then upstairs she has her room full of toys and in the bonus room we have an Ikea storage center with bins full of stuff.  In our den we had a little chest I got at Hobby Lobby when she was a baby that is about 2 feet wide by 1 foot high and deep.  That no longer contain hurricane Evelyn.  So Joe and I came to terms that we needed to invest in another piece of furniture for the den. 

Luckily, Northwest Arkansas got a Home Goods!  Imagine my excitement.  I knew that they would have something just perfect for the den.  I went opening day of course right when they opened.  I had to drive around for 5 minutes and had 2 parking spaces stolen from me as I was attempting to pull in.  But I finally snagged the last space on a row.  I'm getting out of my car and there is a BMW small sedan parked behind me.  What happened next was.......an unusual encounter to say the least.

The Latina woman with big black sunglasses and extremely long fingernails began to yell at me and say I stole her space.  So I said something like "I'm really sorry, it's a busy day and I had a few spaces 'stolen' from me as well (I didn't air quote stolen.  I'm using them now as a sarcastic reference).  And I tried to laugh it off.  No go.  She starts yelling and saying "I'm not talking about YOU.  I'm talking about ME!"  The woman goes into a tirade about how "Everyone is suppose to be so nice here!  Why aren't you nice?! Everyone keeps saying how nice it is here"  So I'm completely taken aback.  Then she points to me with her long index finger nail and says "You hit me. So I hit you."  I'm completely befuddled.  I'm thinking is she gonna ram my car with hers?  Because I didn't "hit" her.  Then I thought maybe there was a slight language barrier and she was saying "hate" instead of "hit".  So I of course just walked off and snapped a pic of her license plate as I walked toward the front doors in case she did decide to "hit" me. 

After I get in the store I try to laugh it off and think "Maybe she's just having a bad day."  But then the longer I shopped the more my mind ran wild and I found myself looking over my shoulder thinking her brother and his friends are going to come kidnap me.  Or perhaps I'd walk out to my car and someone would be on top of it slamming it with a baseball bat. Turns out none of those things happened - yet.  I have a semi noticeable car up here b/c there is not an Infiniti dealership.  Not to mention a Mavs tag on the front and a razorback on the back.  And it's blue.  Seriously - it's the only blue G35 I've seen up here.  Don't worry though - still have the license plate pic.

Back to the real reason I'm writing this post is the cabinet I bought at Home Goods that day.  There were 3 contenders to choose from.  I sent pics to Joe, didn't hear back, made my own choice, then he finally texts as I'm checking out and luckily his choice matched with mine.  Love that guy.  This is what we ended up with


Joe's one problem with it was that you could see into it.  But I assured him I would fix that problem right up!  I also wasn't crazy about the black pulls so I spray painted them gold the next day. 
 
I considered lining the doors with fabric and was totally going to do it, but then I was walking around at Hobby Lobby and found this 
 
 
These are lightweight laser cut aluminum sheets - and they have all kinds of patterns.  I grabbed one to take home to see if we liked it and it was definitely the winner.  So after another trip to the Lobby, a little teamwork, a pause to go to Home Depot to get more staples for the staple gun, and then some elbow grease - we had our finished product!


The blue you see on the top shelf are just fabric boxes I got from Target.  Probably gonna go get another set.  I kinda like the peek-a-boo blue. 
 
I'm not excited how the pulls turned out.  They looked good before we added the aluminum screens but the screens are so busy I feel like I need a more substantial knob or pull there to balance.  I'll keep you posted friends!

Wednesday, April 3, 2013

It's Christmas in April!

I don't know about you, but every after every Christmas I have internal turmoil about what to do with all the Christmas cards we received.  As a family we do the obligatory photo Christmas card each year and try to have fun with it.  But it can get expensive!  This year I designed the card in Photoshop all by myself and uploaded it to Vistaprint and saved probably $25.  What's that?  You want to see our card? 

Boom!  There it is.


As you can imagine - the response was HUGE. 
 
I saw an idea for the pic on Pinterest.  Then was searching for card templates on Etsy and got the idea for the wording.  I then setup my tripod (never used it before) that Joe got my for my birthday two years ago and had E pose mischeviously (egged on by the help of Mr. Will acting a fool) then Joe and I posed without moving the tripod; then the photos were merged in Photoshop.  The lights E is holding are all real.  The lights wrapped around Joe and I are half real - half clone stamped (Photoshop vernacular). After turning the photo black and white I went in and hand colored the lights.  It took awhile to do (4 hours or so in Photoshop) but it was worth it.  I also had a lot of trial and error too so that added time. 
 
Anyway - back to the real reason I'm writing this post - people spend a lot of money and time on cards and I feel bad just throwing them away.  So for the past 4 years I've been hording and storing all the Christmas cards we get.  I figured that someday I'd have an epiphany and figure out what to do with them. 
 
That day has come my friends.  I honestly think I got the idea while looking at my Benjamin Moore paint samples; lots of cards all attached together....idea was born.  So during E's ballet class last week I ran next door to Office Depot and picked these up:


 They are like a keychain - but just pull apart!


I hole punched the corner of all the cards and strung them on.  Went to my paper supply and made a cover with red cardstock and used my Cameo to cut the numbers out in gold sticker paper and Voila!  A way to preserve Christmas cards! 


I also did all the baby announcements we received and hung them in the back hall on our corkboards.  These little rings are turning out to be pretty handy! 
 
Being as it's only April I'm going to wait until next December and probably add a green bow to the rings and display/hang them somewhere during the holidays.  Maybe from the mantle in the den?  (We hang our stockings in the living room). 
 
Does anybody else have ideas on how to keep Christmas cards preserved? Please share!

Tuesday, March 26, 2013

Petal Pillow

Today's project was pretty fun to do - and E was very happy with the finished project which always adds to my joy. It's a project that you need absolutely no sewing skills to do! With no further ado, I give you How to Make a Petal Pillow.

It's a petal pillow!  I saw some on Etsy and thought they were so cute but the wait for your order was like 6+ weeks.  So what did I do?  Figured it out and made my own!  I made my own stencils by hand for each petal size and have made a pdf document link for you to download and use if you'd like.  This is the first time I've done the pdf thing so let me know if it doesn't work.  (Link is at the bottom of the blog entry).

I had some leftover polka dot fabric from Evelyn's comforter my mom made so I cut a 17 by 17 inch piece.  (Specific directions on how to make a pillow cover with zipper are found here).  I bought a yard of the hot pink felt at Joann (used a 40% coupon which they always have) and on a separate trip bought the button with another coupon from Joann as well. 


I'm not gonna lie.  This project was pretty time consuming but that was in part because I had no clue what I was doing.  Hopefully the stencil I made will help you out.  You just cut the felt and sew it on in a circle onto the fabric.  That sounds simple enough, right?  But when you do layer after layer after layer it takes awhile.  And sometimes I wouldn't cut enough petals and had to go back and cut more.  It was an ongoing project that lasted a few nights. 
 
I didn't change petal size every "row" I sewed.  There are only 7 petal sizes on my template and probably 10 or 11 "rows" that I ended up sewing.  There is definitely no "right" way to do this.  You literally just stack them on top of each other and keep sewing.  I do suggest sewing towards the bottom of the petals.  After I was completely done "petaling" I went back on some rows and sewed another round of stitches in to make sure the petals laid flat. 
 
A view of the what the backside of the fabric looked like when I was done sewing all the petals onto the fabric. 
 
I really don't have any directions other than just go for it! 
 
Here's a look at it in process. 
 
 
 A look at the finished project before I added the button in the middle of the flower. 

 
I created a pdf download for the stencils I made and used for the petals for this pillow.  That link is here.  I hope this helps!   
 

Wednesday, November 28, 2012

High Heels Storage Option

I missed you too.

Between E's birthday/birthday party and then hosting 14.5 people for Thanksgiving - I've been busy.  You know who isn't so busy?  Baby Joe!  He filed the 10 K on the Monday before Thanksgiving and he took the rest of the week off from work~we were super lazy and played and cuddled a lot as a family.  We all really missed him (dogs included).  Now he's back to "normal" working hours and that's great because he picks E up on school days and makes it home in time for dinner!

I've got so many posts I want to do that I don't know where to start.  Today I'm just going to do a little DIY project I did to glam up my closet.  I know, it's a closet.  But I spend a lot of time in there and I want it lookin good - and organized!

At our Dallas house we had this great shelf in the closet that wrapped around the top and I put my multiple pairs of high heels on display up there.  I mean, they are sooooo pretty that should be hidden or thrown in a drawer!  We do have shelves in the closet at the new house, but I had too many shoes and couldn't put them all out (is that really a problem?). 

Now, I use to be OBSESSED with shoes.  It was "my thing".  My one little vice that I gave into, and gave into it I did.  Now that I'm retired I don't wear heels 5 days a week to work.  In fact, I probably wear heels once a quarter (that's no lie).  So I took the plunge and got rid of a bunch of the shoes I never wear - or ones that just weren't practical or needed anymore.  After narrowing the field down, I still had a ton. 

I don't remember where I got this idea.  It was probably a magazine or pinterest or actually in the Ikea store.....but I simply purchased a rod, mounted it, and hung my heels from it to give me more use of shelf space - and it looks fancy too ;) !


I got the rod at Ikea - you can find it here.


Does anyone recognize the boxes on the top shelf on the left?  Note I'm turning my hangers around for the second time this year trying to get rid of more clothes. 

Tuesday, October 23, 2012

OSU Applique Shirt

Today's post is about one of my favorite people in the whole wide world.  Her smile is infectious as is her laughter and she always brightens my day when I get to see her.  I'm so sad she lives back in Dallas and our interactions are few and far between.  And she's 2.

Everyone, meet Rylie:


J'adore.  She is one of E's original besties and we always have a good time when our family's get together (which I wish could be more often!)

So last week was War Eagle Craft Fair up here - it's kinda a big deal.  I usually stay away because traffic gets crazy, but decided on Thursday to hit up one of my favorite stores because for the first time they opted out of the actual fair and just had their sales in store.  So up I drove to Vintage Glam & Junque in Rogers in hopes of finding some gifts for the 2 birthday parties that E is going to over the weekend.

I walk in the door and I see the headbands and it hits me - I'll get those girls headbands!  And they had them on special :).  Here is a pic of Ev with her new one on.  She has a Razorbacks one too.


So I'm digging through the basket and I find an OSU one!  It was so cute and I just had to get it for Rylie - both parents are OSU alums and make frequent trips to the football games in the fall.  I just love the fabric they used.


So I get home and I thought - I can't just send Rylie Bug a headband....I should make a shirt to match.  So I grabbed some orange gingham plaid and made this!


Now she can show her support at the games, or out on the town! 

 
I've decided - or come to the realization that sewing is "my thing".  I really get a lot of enjoyment out of it and I get to use a bit of accounting because it really uses a lot of math and figuring out things like a puzzle.  I rarely use a pattern and I think that's part of the fun; figuring out how to do it!
 
Tomorrow I'll discuss my experience of my first deco mesh wreath.  And in case you were wondering about my loyalties - it's a Razorback one!


Monday, October 22, 2012

Fancy Smansy Nursing Cover

Monday's are always such a wasted day.  I do laundry and get the house back in order from the weekend (since E's at school), and run errands and next thing I know - it's time to pick up Ev from school!  Crazy.

I spent today also listing a bunch of stuff on Ebay to sell.  We had some sort of wild animal get in our garage last week (maybe a raccoon or possum) it ate through the wiring for the sensor on my side of the garage and used the bathroom on both sides A LOT.  We decided this was a great excuse to clean out and go through all the boxes of stuff in our garage. 

Emptying the garage and cleaning only took an hour - and No, we didn't find an animal.  Then going through the boxes and documenting our charitable donations and throwing away and putting away and deciding what to sell took about another 8 hours!  It was crazy, but the garage looks great!

So I listed some stuff on Ebay but also had an amazing 2 hours (tops) project I just jumped right into.  I had a person contact me through Etsy to see if I could make a nursing cover for her friend with my flannel monkey fabric.  So I got out my Hooter Hider from when I was pregnant and decided yep - looks pretty easy.  It's essentially a blanket with some straps with attached D rings.  So poor Rita agreed to be my test run - and ya know what?  It turned out great!  I love the fabric I used so much that I want one now!

I did a regular cotton fabric on one side and used minky on the other side.  It always bothered me the hooter hider didn't have anything soft on the inside since that was the part that touched the baby.  I made it 35" wide by 25" tall and here it is!


Tomorrow I'm posting about another sewing project I did this weekend for a friend's little girl - OSU fans will want to check in for sure!
 

Wednesday, October 3, 2012

New School Spirit Pumpkin - Texas A&M

I love me some ceramic school spirit pumpkins - and apparently so do all of you!  I literally bought every single pumpkin at 3 different Hobby Lobby's and have sold them all. Here is the arrangement I did on our countertop to support our Hogs this football season.  It didn't help the cause as I'd hoped.
 
Ceramic white pumpkins are from Hobby Lobby.  Pig statue is from Signed, Sealed, Delivered in Rogers and "Go Hog Wild" letter A is from Vintage Glam & Junque in Rogers.
 
Per usual, I did the Arkansas and OSU pumpkins, but got a special request to see if I could do a Texas A&M one and I gladly accepted the challenge.  I have truly never met anyone from A&M that I didn't like so I was happy to give it a try.  Do I feel bad now that we received a romping from them last weekend?  No! That's totally not my fault.  I'm not that superstitous. 
 
Finding the perfect color paint pen to use was a challenge.  I almost tried out oil based paint by hand and then I saw a Krylon Red Leaf Paint Pen - you know I LOVE my gold leaf paint pens.  Turned out - it was the perfect maroon A&M color!  Take a look. 


For the life of me, I could not find a ribbon that looked good with it.  After discussion with the buyer, we decided to leave it off.  I'm so nervous about her getting it because I shipped two pumpkins last week and they arrived to the buyer like this:


I almost cried.  They were so beautiful and reduced to shards.  The box was totally undamaged and I haven't had a problem with any of the other ones I shipped.  Heart breaking.  I also had a problem with finding another white pumpkin to make a replacement, but luckily my Mom found one in Fort Smith and brought it up yesterday.  So between repainting those two pumpkins and making curtains I'm staying busy and getting a good night's sleep lately.

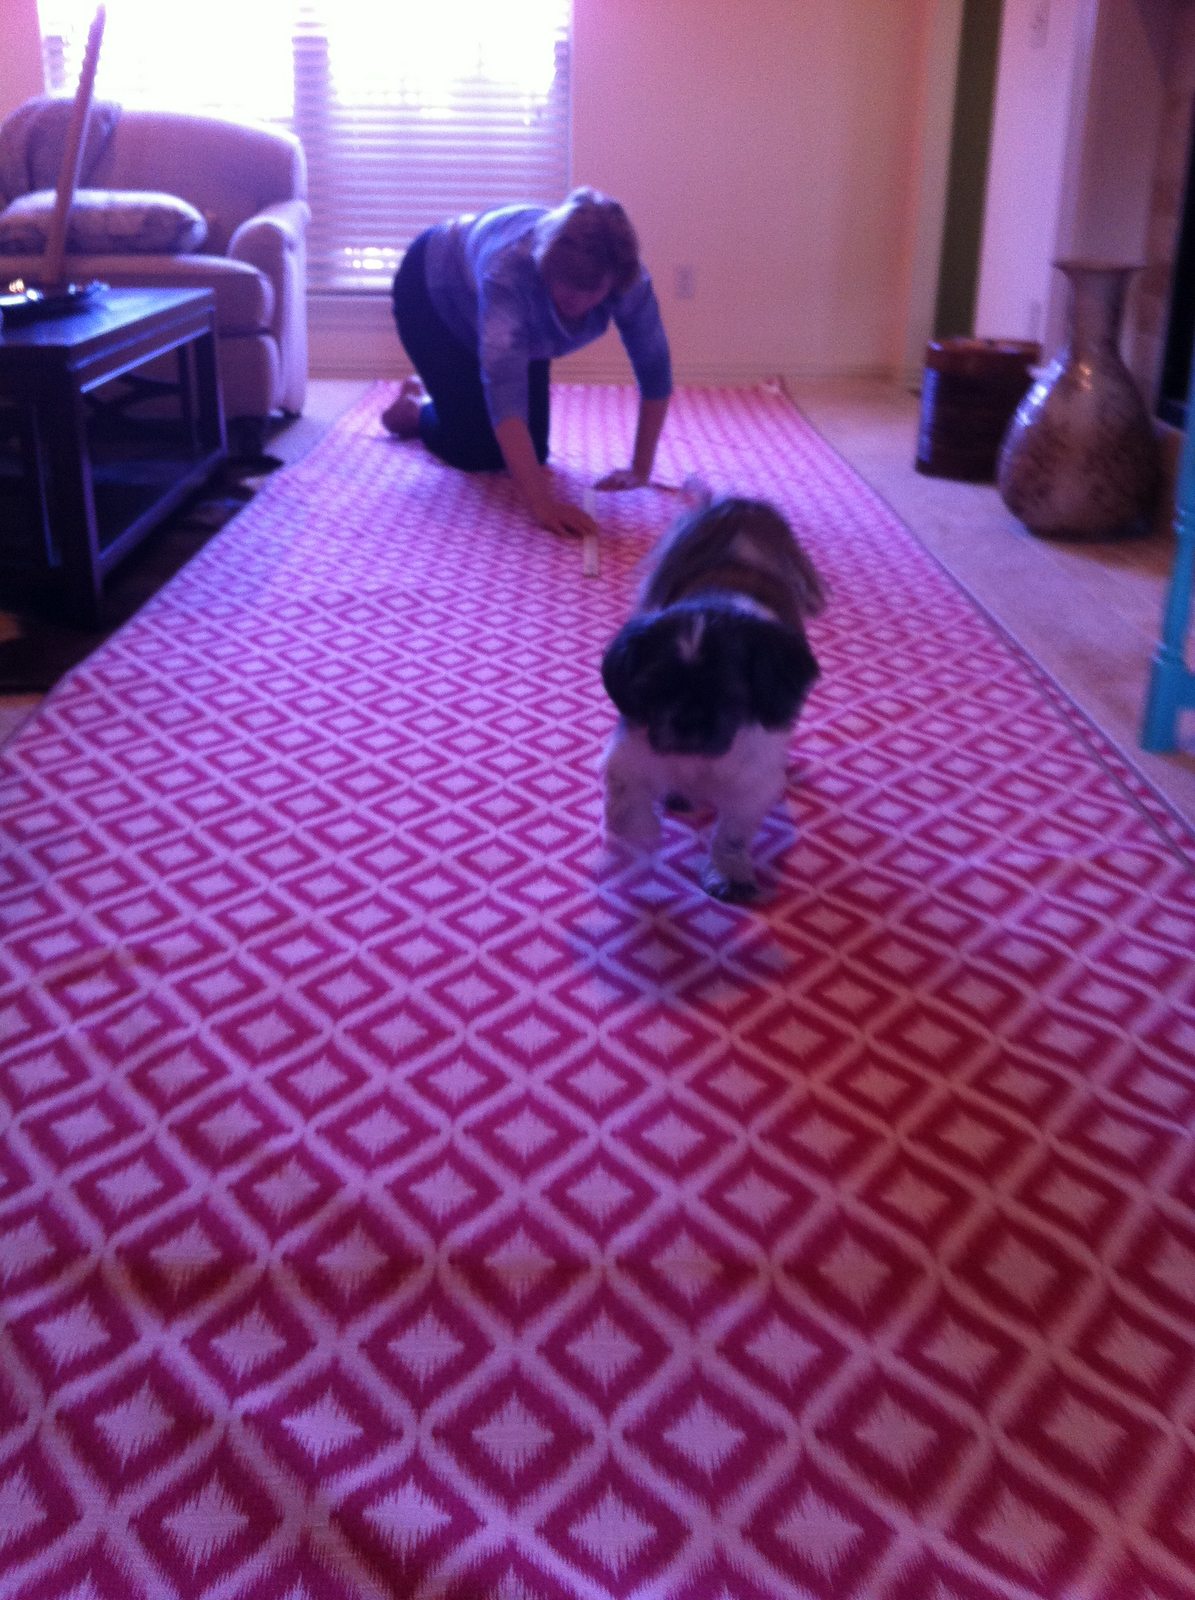
Here is a fun pic of Mom and I working on the curtains yesterday.  Whenever I lay fabric out the dogs immediately come from wherever they were in the house and want to walk all over it and lay on it.  Luckily we got E to nap yesterday, so she was a non-factor during the laying out 11 yards of fabric and cutting into 4 equal panels. 


Back to work! I'll be lucky to get 2 panels done by the end of day at this rate.  To break the monotany I'm working on a petal pillow for E's new room as well.  Sewing extravaganza week!

Thursday, August 2, 2012

DIY: How to Make Pillow Covers with Zippers


This is a DIY that made me raise my arms to the heavens and say "WHY?! Why didn't my mother teach me how to make pillow covers this way!??"  

Making pillow covers with a zipper is about 100 times easier than having to sew those suckers up by hand, which also saves at least 30 minutes.  The things I could do with an extra 30 mins:  vacuum, paint my toenails, catch some Team USA Water Polo - the possibilities are endless. 

I've got a lot of things I'd like to accomplish before picking up Evelyn from school today so I'll get right to it.  (Once she's home - all eyes must stay on her or she begins a silent protest of mass destruction). All in all - my entire worktime was 30 minutes.

Materials You Need for the Project:
A fabric of your choice - you can do the math on how much
A zipper (I used invisible)
Thread
Sewing Machine

JoAnn had this great 50% off coupon that the check out girls let me keep so I used it over and over again.  Two of those purchases were 20 inch pillow forms.  I ordered this fabric from Fabric.com (Waverly Cross Section in Bluebonnet).


Here is my math:  The fabric is 54 inches wide.  I need pillows that - on the finished product - are 20 square inches wide on both sides.  So 40 inches squared.  Plus 1 inch on each square to account for the seams.  So 42 inches squared.  I'm making 2 pillows, and a yard is 36 inches.  So I rounded up and ordered a yard and a half.  I even Instagrammed a photo of my drawing :).


First thing I did was cut my fabric into 4 equal sized squares.  Each piece was 21 inches square.  After I cut all 4, I laid them on top of one another and trimmed them down to all match perfectly. Now, it's sewing time!

This is what our invisible zipper looks like:


This part we are looking at now, is the part we will see on the outside of the pillow when we are done - aka "the pretty side".

So, lay your fabric pretty side up, and we are going to lay the zipper on top of the fabric ugly side up.


Line up the sides together and pin the length of the zipper.


Now we sew.  I put a zipper foot on my machine, but you don't have to use that.  The zipper foot gives you the ability to get right up as close as possible to the zipper part so less of it will show on the outside (pretty side) when you are done.

Drop your foot.  Get as close as possible, and sew.  Tip:  You will have to unzip and zip the the zipper to get the entire thing sewn in because of the zipper pull.  I dropped my foot right after the pull, then after I had finished sewing the length of the zipper I went back, unzipped it and sewed those first few inches. 

Drop that foot right up next to the zipper

 I started sewing after the zipper pull - then went back after, unzipped, and sewed the first few inches

 An in progress photo

This is how the pretty side should look when you are done sewing

 An inside look

Alright!  Now that we finished that side we need to do the other side.  Zip the zipper back together, and begin pinning the 2 fabric squares to each other.  I started with one corner and pinned a few inches in on each side from the corner.  This will insure the zipper will be lined up perfectly when we pin it and sew it in.


Now pin the zipper to the other side of the fabric.  Remember pretty side of fabric up, ugly side of zipper up.


And sew it just like we did the other - make sure the other side of the fabric is out of the way.


Moving on!  Now, I want to finish up the zipper side before I move on to the easy-peasy sides.  What we need to do is pin the remainder of the side to where the end of the zipper is on the inside of the pillow cover. 


Here's what it looked like after I finished sewing:


Now, that the hard part is done - let's finish 'er up!  First, I pinned the other 3 sides I hadn't worked on.  That still left a few inches unpinned in front of the zipper head.  Before you pin those, unzip the zipper!!!!!!  Again, UNZIP the ZIPPER!!!!  Then pin.  Then you just sew each side together. 

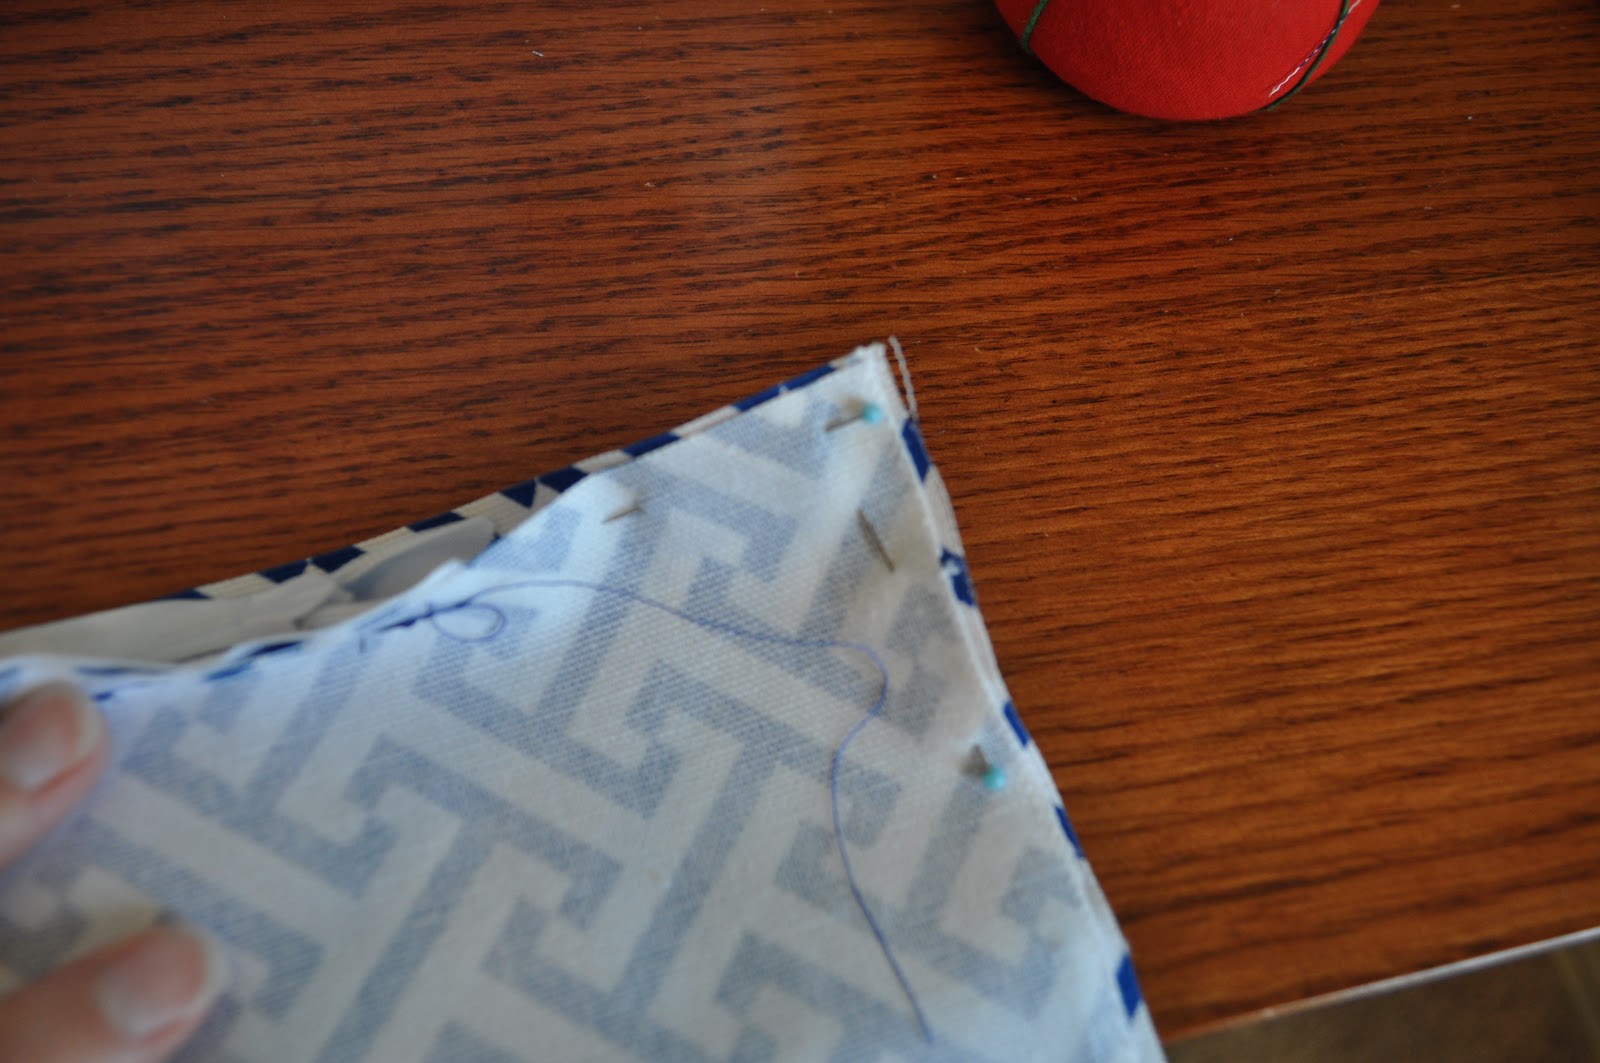
I took my seam all the way to the edges of the fabric.  You'll end up with a little box in each corner.  Take your scissors and clip a little triangle off each corner.  This will help give your pillow a nice, pointy corner.


When you get back around to the zipper head area, just do the steps we did for the other end to finish it off.  Then, Voila!  A fabulous homemade pillow cover that costs WAY less than Pottery Barn or shopping off Etsy!


 Before.....

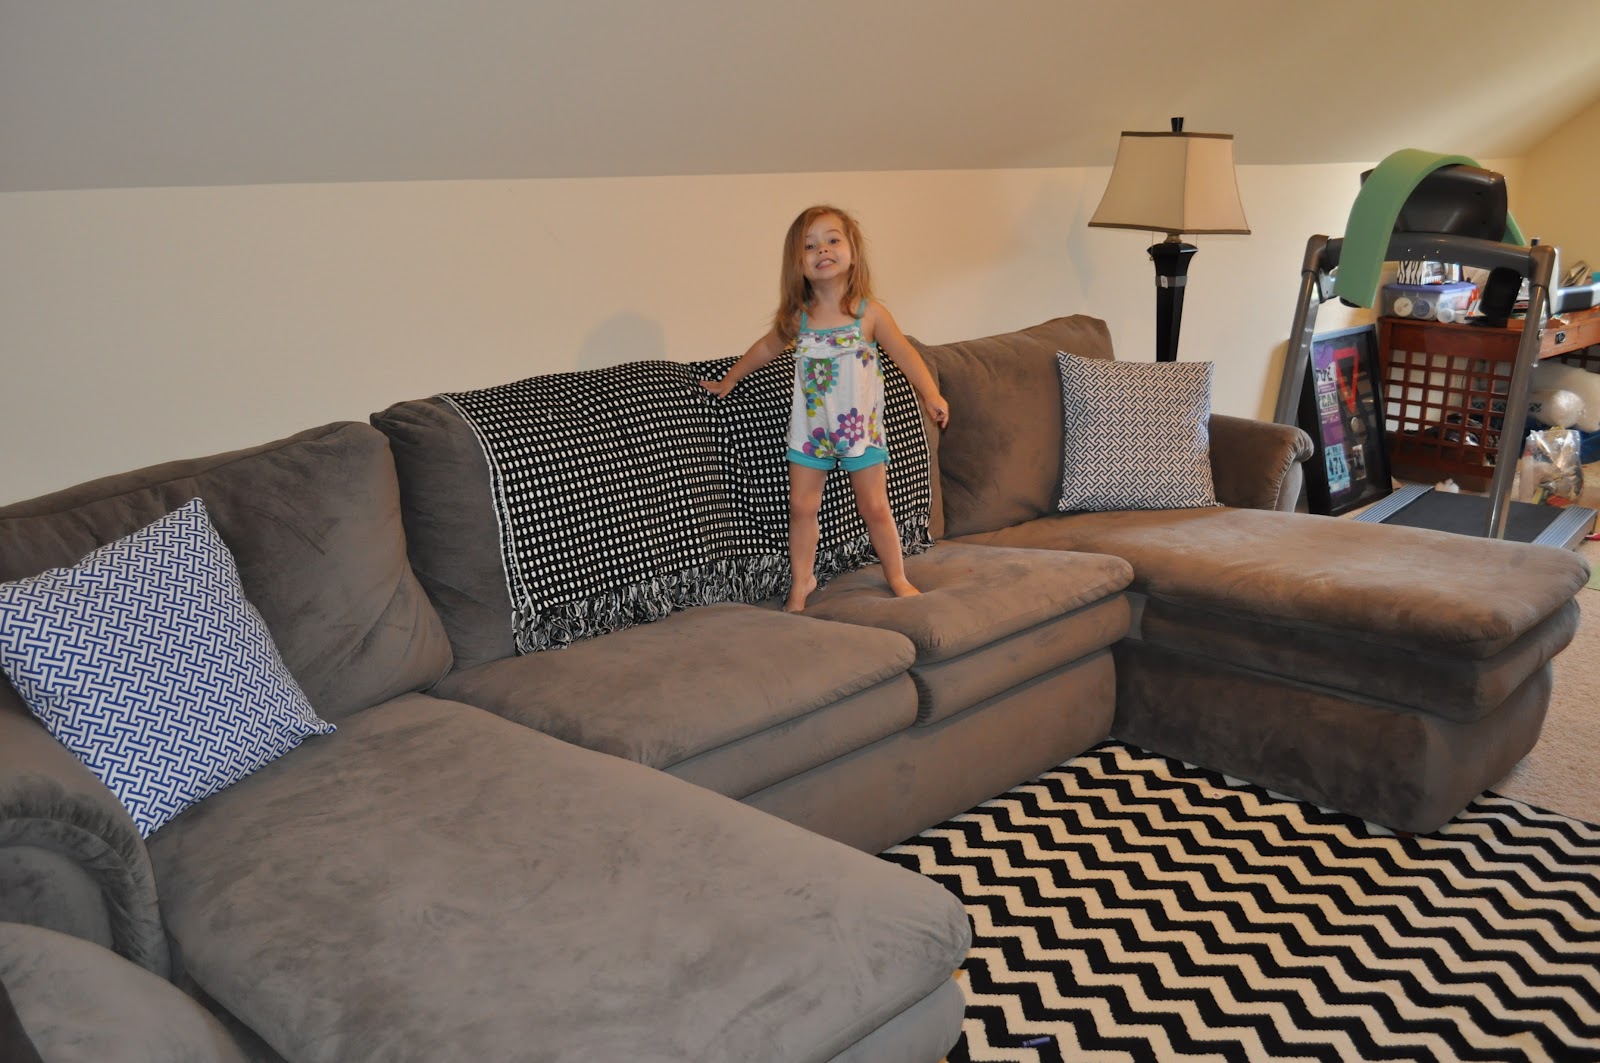
After!  Sure made Evie happy!

Since we are keeping the walls Rich Cream, that area was desperately needing a pop of color.


LinkWithin

Related Posts Plugin for WordPress, Blogger...