
This is the last piece of the puzzle for our dining room chairs. The first part of this post will deal with cording for the chair seat. If you don't want cording on the chair. That's fine. Below is what our finished product will look like without cording, and you can jump down to the bottom to wrap up the project.


Today's lesson will involve sewing. Don't be afraid. You don't need a fancy smancy sewing machine for the kind of sewing I'm doing. My mom got me my "Limited Edition" Project Runway machine (made by Brother) like 3 years ago and it still available today for around $120. Limited Edition, my Aunt Fanny.
Yesterday I went to JoAnn Fabrics to pick up supplies. In the sewing notions section, this is what I picked up:

This is 9/32 of an inch cording. There are lots of different sizes like 12/32 and 6/32, but I thought the 9/32 was just the right size for the cording we are going to make.
Also, at any fabric store you can pick up ready to sew cording like the ones I found below at JoAnn. The first is pre-made cording in an upholstery weight fabric that comes in a range of colors. This fabric will wear and tear better than the type in the second picture. Granted, we are reupholstering dining room chairs and they won't be used that often, but I still don't recommend the second type of cording for them, although it is very pretty.


So that's the easy route. Buying pre-made. I don't take the easy route though (I'm quite stubborn) so I'm going to detail how to make your own!
First, you must make your fabric choice for the cording. I could have used more of the bird fabric, but I instead chose a fabric to help bring out the green and fushia in the bird fabric instead of the reds (as I painted the room red). So here is my fabric choice:


I picked this fabric up at Fabric Factory in Dallas after an extensive search all over Northwest Arkansas and Dallas. I've tried finding it online and can't. Fabric Factory called it "Bahia Kiwi". The second I saw it, I knew it would look great with the birds. I figure I can also use it on the window treatments and maybe for a table runner as well.
Here's the deal with how to cut the fabric for cording, it depends on the fabric. Here is a pic of what my cording would look like if we cut it straight across:

Me no likey. It's a little too stripey, so instead I'm going to do it the way my Momma taught me and cut the fabric on the bias. This also allows for the fabric to be a little stretchier which is good when you are stapling around corners. There are a few different ways to cut into the fabric. You can fold it at a 45 degree angle and cut into it, but I was never good at geometry so instead I laid out the fabric on my self-healing cutting mats, started at the corner, and just cut in a diagonal all the way to the other side.
 |
| Starting at the corner, I began to cut my strips. |
After you get your strips of fabric cut it's time to figure out how much cording you will need to go around the entire seat. I do this by draping the strip around the seat to see how much coverage one strip will give me.
In my case, I have a few options for my cording.
Option 1: The longest strip of fabric I cut (the first one right down the middle), just happens to be long enough to wrap around the entire seat. Perfect! I'll just sew in the cording and 1 seat will be done.
Option 2: Because of the way the seats sit on the chair frame. I can do 2 separate strips of cording without having to sew them together. Like this.

The break in the cording will be hidden by the chair frame.

Option 3: Make one long strand of cording by ourselves. Not too complicated. What you do is take 2 strips. Lay them in an upside down V position. The bottom with the pretty side up and the top piece with the pretty side facing down.

Then you get the V laid on the sewing machine and just sew straight across.

Then after you are done you just flip the pretty side down piece up and Viola! You've doubled the length of your cording! If needed, trim the excess fabric past the hem on the reverse side.

Now let's get started on sewing the cording into the fabric.
Here is your strip of fabric.

Take your fabric and fold it in half around the cording.

I then sew straight across the fabric and cording to make sure the cording won't move around as I'm pinning the remainder of the fabric.

Now you will use straight pins, and pin the fabric around the cording down the length of the strip. I prefer to use the pins than not.

Another little trick I use is to hold the strip under the foot of the sewing machine to hold the cording taut while pinning the fabric around.

After you get the fabric pinned around the cording it's time to sew. The cording is a little bulky so I like to butt it up right next to the foot of the sewing machine. Sometimes when I feel really talented I even let the foot up on the cording a little bit so I can get a closer stitch line. I also feed the strip at an angle to get a little closer to the cording. When all is said and done, you should just have a tube of fabric around the cording.

See how I feed it at a slight angle so the stitches are closer to the cording?

Finished product!

Fabulous! Now it's time to staple. Again. But we are so close to being done!
I'm starting the cording at the little inlet which will be hidden by the chair frame so you won't see the break in the cording. Just start stapling! You won't need to put as many staples as we did for the fabric. About every 2 to three inches (staples will be closer together around the corners). Make sure you have the cording butting up to the edge of the seat. Just take it a few inches at a time.

1st strip of cording laid.

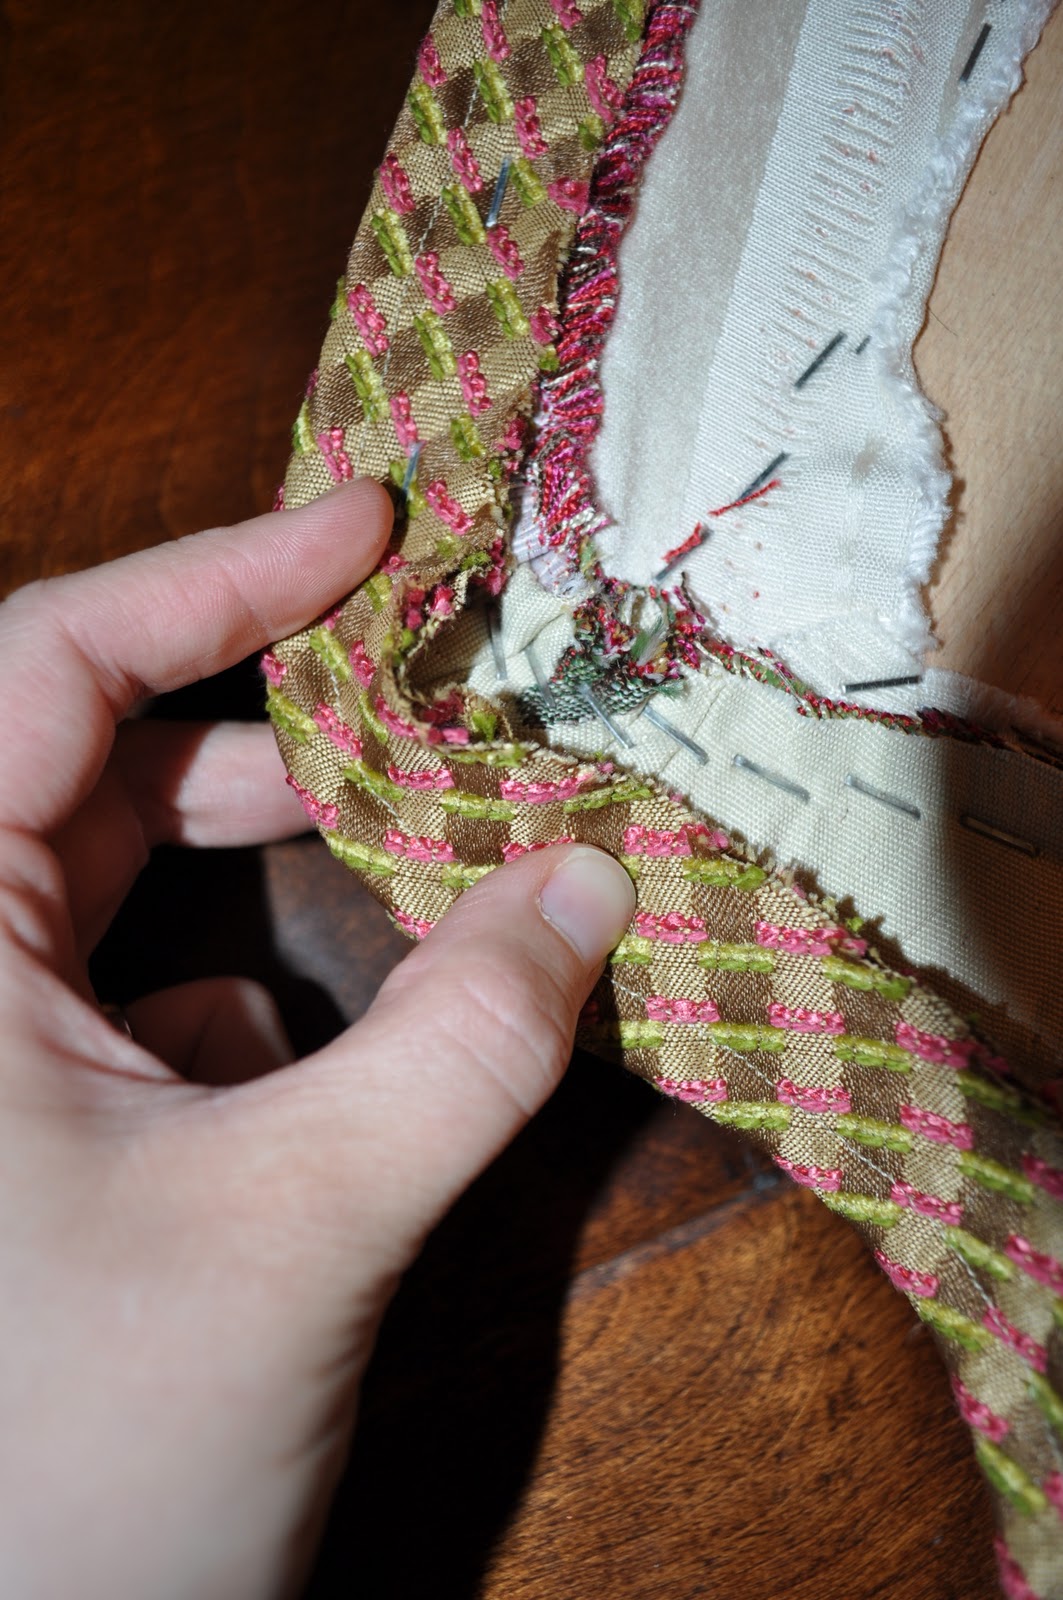
When I staple around the corners I go ahead and lay it out a few inches in front of the last staple and just hold the cording with my fingers until I get it stapled down.
Here it is all finished!

Top view of the seat with cording

Now I'm going to staple back on the dust guard.


And now we are just going to put the seat back in place on the chair frame and screw it back into place.

And what do we have here? Beautiful newly covered dining room chairs. Instant upgrade!


I hope everyone has a great weekend planned. Perhaps I've inspired a little weekend project for you!
Click here to go to Part 1.
That's really very nice blog. Good job and great efforts. Keep it up.
ReplyDeletebest fabric for sofa upholstery