

Today it's rainy and gross here which has given me a chance to work on a bunch of little projects I've been trying to get around to for awhile now.
I started the day off with a key rack project. We really need one that is out of reach from Lil E and this was cost effective and easy - and I was so happy with the results! Evelyn keeps grabbing our keys off the counter and setting off the alarms. She just loves to push buttons - both literally and figurately!
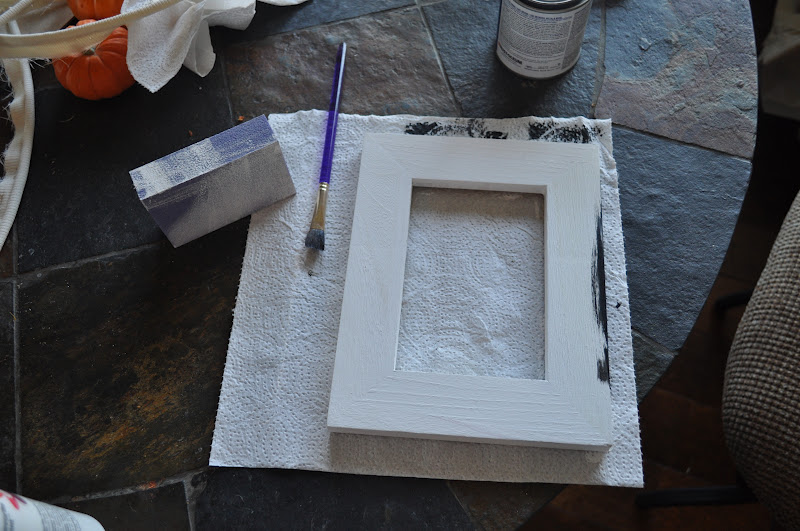
I started off at my local craft store and got a 4x6 raw wood picture frame. I sanded it a tad and then did a coat of white acrylic paint. When that dried I did a few layers of black acrylic paint to finish that part of the project up.

I used white paint under the black so I could sand the corners a tad so the white peeks through. This way it'll match my coat rack in the laundry room I painted the same way.
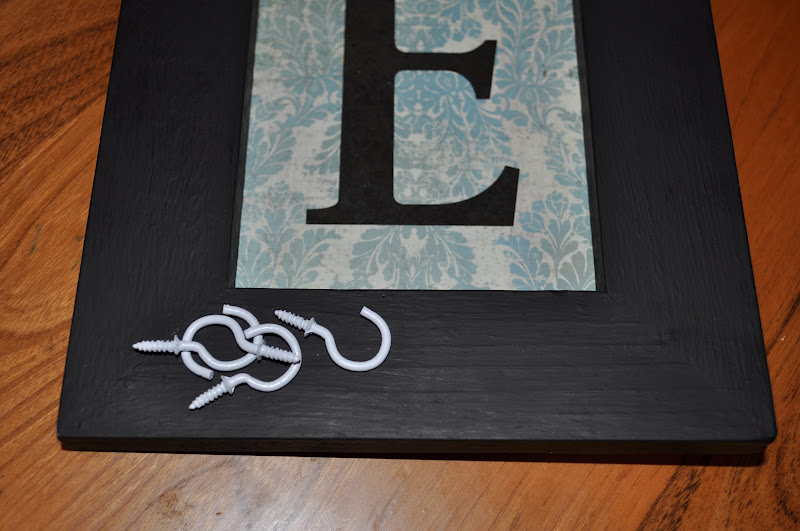
While the paint was drying I headed up to my computer and played with all my different fonts - trying to find the perfect "E" (for our last name). I settled on Byington in Microsoft Word and made the font size 400. I printed it out on regular paper and just made sure it would fit in the frames picture hole - first time was the charm! Then, I cut the paper down and fit it in the space - but the glass and back on and Voila! Almost done!


Sidenote: I found a box lid and punched holes in it using a pen (a pen you write with) and stuck the hooks in the holes so it was easier to paint them. Otherwise (and I learned from experience) if you don't do this, you can only spray one side at a time and the paint can glob up next the surface the hooks are laying on.

While those were drying I grabbed a piece of chalk from Evelyn's easel and marked off where I wanted to screw in the hooks. Chalk is great for markings on all projects - fabric included, because it is so easy to remove.


And there it is! My perfect little key rack!!! I was so happy with the framed "E" before I put the hooks in I think I'm going to do this again and just frame an "E" for our living room or den for decoration!
Don't forget to enter the earrings giveaway before Thursday at midnight! Enter here.
Love this DIY key holder. You might as well try diy rack using pipes.
ReplyDeletePipe Rack System Supplies Philippines