

Once I bought all the stuff, the execution only took me about an hour to complete and that was with E interrupting me because she wanted to watch Bubble Guppies instead of Dora and needed ice in her juice 5 times. It really was pretty easy, if you need help - I charged minimum wage and mileage :).
Ingredients - Err, stuff you need to do this craft
- 1 T-shirt (color of your choice)
- 2 Googly eyes (sew on or glue on is acceptable)
- Assortment of ribbons (It will depend on the size of the turkey how many ribbons you need~I used 7 which was a mix of ones I had and some I bought by the yard at Joann Fabrics)
- Iron-On Fusible Web (this is like a fabric version of Stitch Witchery discussed here)
- Brown and Orange Double Knit fabric
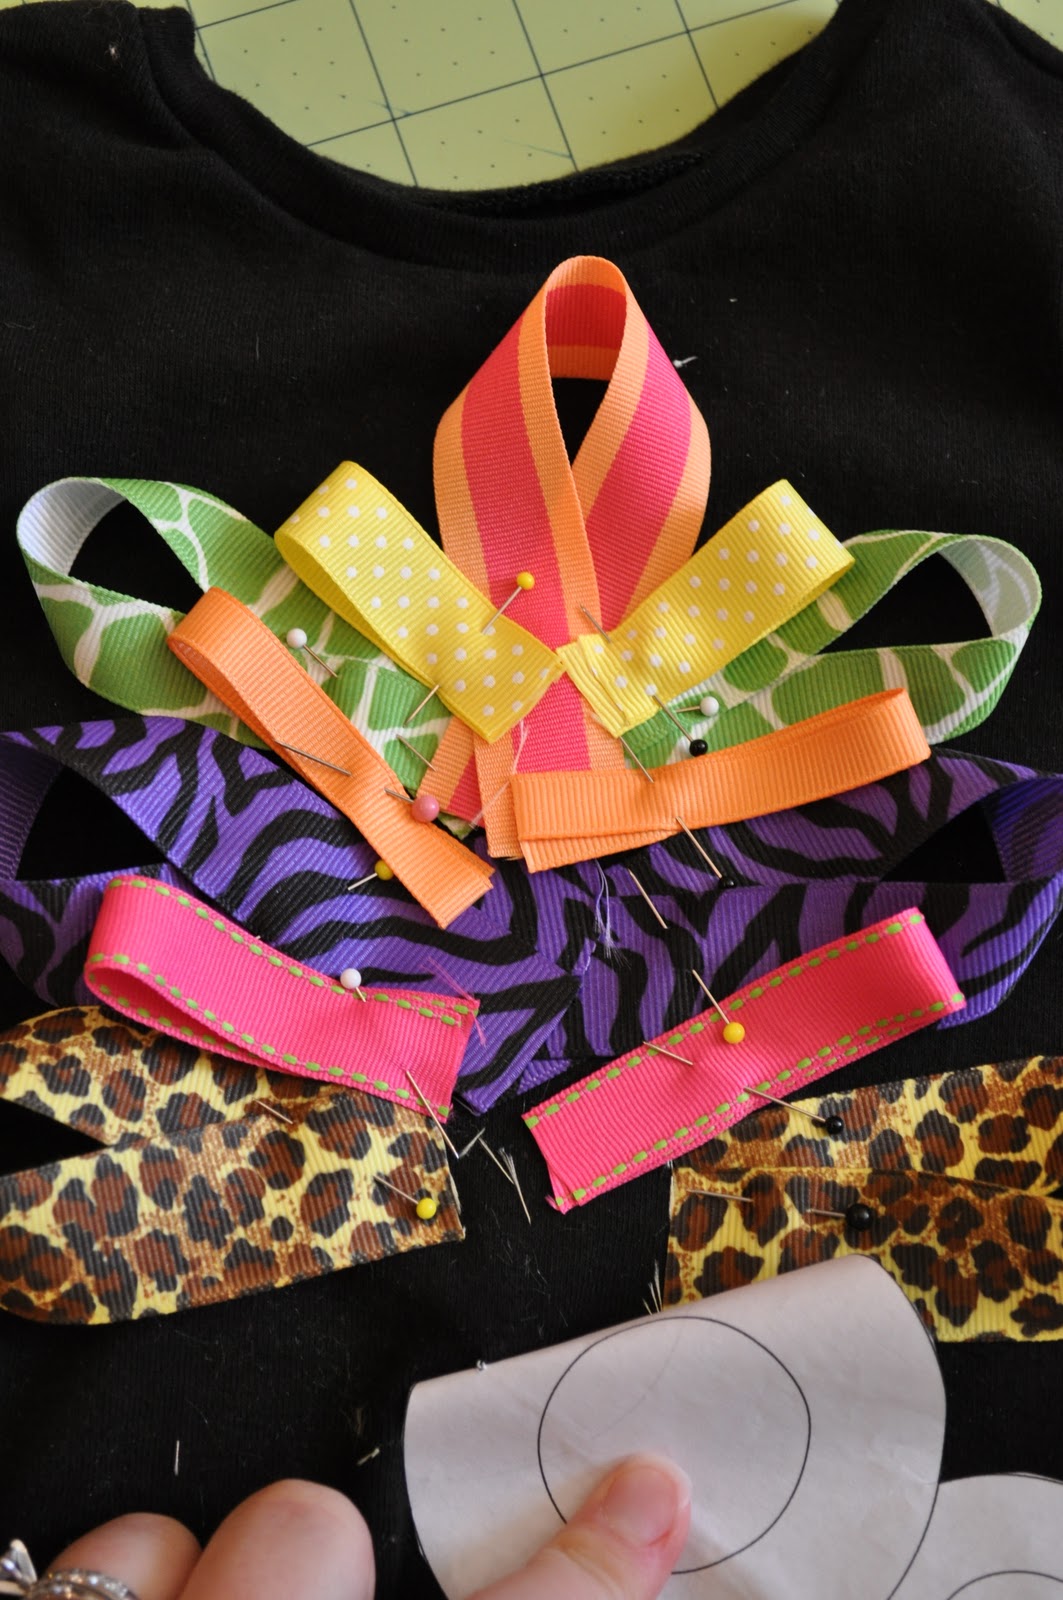
I then made a paper pattern for the body of the turkey and stapled it onto the shirt to help me with the placement of the ribbons.


After that I just started cutting the ribbons and pinning them in place with straight pins. This is what it looked like when I was done.

I then trimmed the ribbons so it wouldn't be so bulky under the turkey's body and used my sewing machine to baste the ribbons to the shirt.

Now on to the turkey. I took my square of fabric and ironed on the fusible web to it. Then I took the body pattern we made of paper and then just traced it onto the brown double knit fabric.

Then I cut it out and ironed it onto the T-shirt on top of the ribbons. I also backed the orange double knit with iron on fusible web and cut out a little triangle and ironed it to the turkey head. It didn't take long at all for it to bond with the iron.


I ran back upstairs and did a zig zag stitch around the entire turkey body which sews not only the turkey down, but the ribbons too. I finished it off with hot gluing on the googly eyes (I couldn't find sew-on ones that were the right size). And here is the finished product!

Very festive! E's gonna get a lot of wear out of this in the next week!!
I don't know how to use a sewing machine. So, do you think I could hot glue on the ribbon?
ReplyDeleteI would hand stitch the ribbon on and then hand stitch the turkey pieces before using hot glue. Only because hot glue can be rather "lumpy" and dries really hard.
ReplyDeleteUse fabric glue. I don't sew and it works fine. Hot glue no good for fabric. Just put a thin piece of cardboard between the fabric and let it dry before ironing center.
ReplyDelete